Authorize.net steps to integrate

Dec 02, 2020
 2177
2177
Here are the necessary requirements to start up an integration with Authorize.net
First, you will need an authorize.net account set up by your credit card processing company.
- This only supports manual pay, remote pay, or a USB magnetic stripe reading device. It does not support EMV/ Chip reader processing.
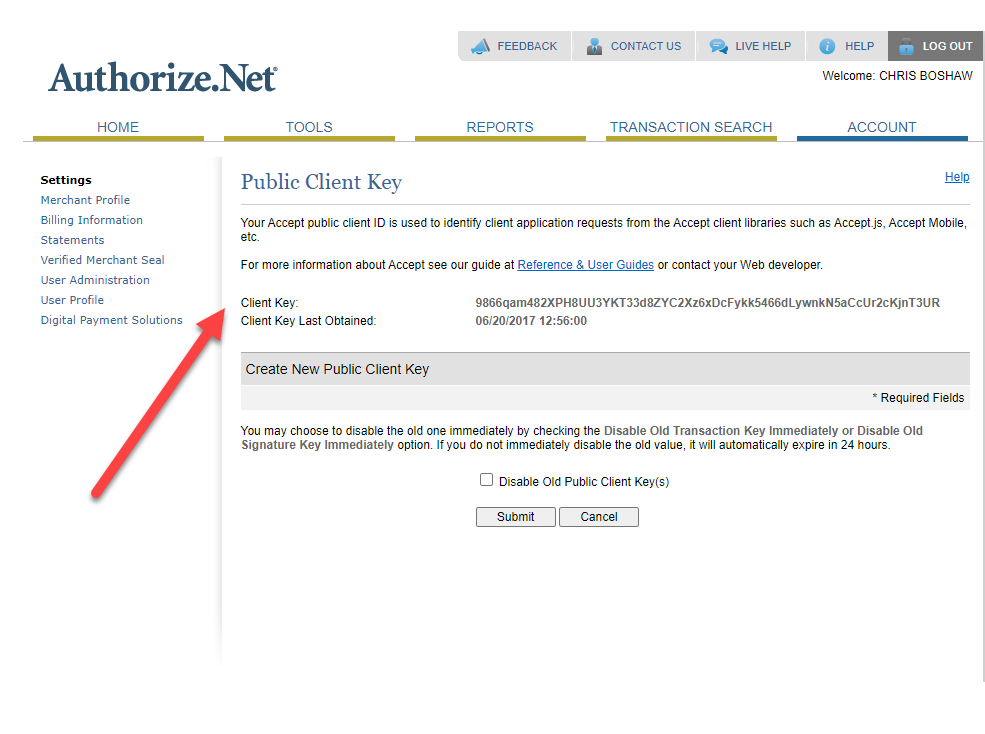
3 pieces of information are needed to update your settings in Shop Boss, all of which are in your authorize.net account under the Account link and pictured below to help you find them.
- API Login ID - API Keys and Credentials are found in your Account link of Authorize.net (pictured below)
- Transaction Key - Please keep track of these and if there is ever a need to re-issue the Transaction Key, it will void the old Key and payments will NOT work properly. So please update your settings when this is done.
- Manage Public Client Key
Once you have this information:
- From your Main WIP, click on Settings
- Click Custom Settings
- Click Authorize.net credentials
- Enter the information in its corresponding place
- Click Save Changes
The connection is created and your are set to take payments.